Showing posts with label ColdFusion. Show all posts

Thursday, September 12, 2013

Introducing validORM: A Development Tool for Creating ORM CFC And ValidateThis Files

In my previous post about relating different data constructs in AngularJS to each other via property names, I mentioned that I figured out that technique while working on an internal development tool.  This blog post is about that tool.

The AngularJS-powered validORM tool lets you design the ID and column properties of your ColdFusion/CFML ORM CFCs while at the same time creating a matching set of validation rules using the ValidateThis (VT) library (a great library for handling both client and server-side validation).

The first view of the tool is a menu view.  You can choose to generate an updated version of your CFC and VT rules file based on a previous session or create a new set of files from scratch.  Either choice takes you to the generator view.

The first two sections of the in the generator view are pretty obvious:  that's where you choose the name and database table for your ORM object and configue the ID property.

The third section, where you define your column properties and create your validation rules, is where AngularJS really comes into play.  The property drop-down selection, the form controls and the hover hints for each property attribute you add, and the validation rule options and parameters:  those are all AngularJS manifestations of JavaScript data constructs.  Using the "Add Attribute" button to add a property attibute simply adds a JavaScript object of that name to the dataset; the creation of the form elements on the page for that attribute is handled automatically by AngularJS based on the Angular directives in the HTML.  That's Angular's strength: driving page behavior purely through data manipulation. 

The data constructs created by your choice of property attributes and validation rules are separate from the JavaScript objects and arrays of objects that represent all of the attribute and rule options, but they reference each other via the attribute and rule key names.

The last two sections allow you to further define any ValidateThis conditions and contexts referenced in your column property rules.  When you're done, clicking the submission button will trigger the file generation process.  Your ORM and VT configuration data will be parsed by a CFC which will then generate three files in the output folder of the tool:

  • An ORM CFC written in script format.
  • A ValidateThis rules definition file matching that CFC written in JSON format.
  • A JSON-formatted snapshot of the configuration data, with a filename reflecting the name of the object and the timestamp when the file was generated.  Said file will then appear in the menu view of the tool.

Some caveats:  the tool only allows for one ID property, doesn't include absolutely every type of property attribute (just the majority of them), and it doesn't let you define ORM relationship properties.  And as my first foray with using AngularJS, I'm sure it violates one or two Angular best practices (if you're an Angular guru, feel free to chime in with any suggestions for improvement).

But it works and can provide a kickstart to creating any ORM files and ValidateThis rules for your projects.  It comes with an example "Employee" configuration set that you can play with and then delete once you start using the tool.

The tool is available for download (and modification) via GitHub:  https://github.com/bcswartz/validORM. I also created a short video of the tool in action and posted it on YouTube at: http://www.youtube.com/watch?v=-fnt_n65NWg

Monday, April 29, 2013

Quick CFML Tips: Script-based Queries And Tag/Script Hybrid CFCs

While refactoring a particular process in a ColdFusion project at work, I learned two things I thought worth passing on:

1.  There are certain scenarios where doing queries in cfscript, instead of using the <cfquery> tag, does come with a significant performance penalty.  In my case, the scenario was one where I was taking two recordsets created by querying the database and running subqueries against those recordsets in a recursive fashion.  My guess is that instantiating the query object needed to perform query functions in cfscript (which I was doing with each recursion) was the main issue.  When I converted the queries and functions involved in the recursive process to use tag-based syntax, the amount of time it took the process to run dropped by over 33%.

Not saying that this means you should avoid doing script-style queries, just that if there are a large number of such queries in a long-running process, you might want to experiment with refactoring them.

2.  I already knew that I could have one or more cfscript blocks inside the body of a CFC function, but I didn't know that I could combine tag-syntax functions and script-syntax functions in the same CFC like so:

<cfcomponent accessors="true">
    <cffunction name="doX" output="false" returntype="void">
        ...
    </cffunction>

    <cfscript>
        public void function doY () {
            ....
        }
    </cfscript>
</cfcomponent>

...it had never crossed my mind to try it that way. Certainly useful when you need to run a CFML function that has no cfscript equivalent in whatever version of CFML engine you're using (I should note that I was using ColdFusion 9.0.1 in both of the above cases).

Wednesday, March 13, 2013

Adding Oracle Support to BugLogHQ: How the Application Design Made it Easy

As I mentioned in my previous blog post, in order to try out BugLogHQ in my work environment, I knew I would have to update the code so it could run against Oracle database tables.  So I started looking through the code to see how difficult of a task that would be, to see if it was worth the trouble.  Changing the code to support another database would mean at least looking at (if not updating) every block of code that performed a SQL operation:  if there were a lot of such blocks, it could be a time-consuming task.

Fortunately for me, BugLogHQ was designed to abtract most of the SQL operations behind a DAO layer.  Each database table used by BugLogHQ is mapped to a DAO CFC in the components/db folder of the BugLogHQ application, and those CFCs spell out the name and cfqueryparam data type for each table field and inherit getter and setter-type functions from a base DAO class.  When it comes time to persist data from instantiated DAO objects into the database, the DAOs are processed by the dbDataProvider.cfc in the components/lib/dao/ folder, and that CFC contains the SQL code for performing all of the CRUD operations.

(I should point out that this is a somewhat simplified description of all of the "moving parts" involved in data persistence in BugLogHQ, but after following the code through the process of adding and removing records I determined that I didn't need to make changes to other objects such as the DAO factory).

The main issue I needed to address was the fact that the current code for inserting a new record took advantage of the autoincrement feature in the other databases supported by BugLogHQ (MySQL, MS SQL, etc.).  Oracle doesn't come with an autoincrement field option.  Instead, Oracle has what are called sequences, which are essentially autoincrementing numbers that exist separately from the database tables (meaning you could, if you wanted to, pull the next integer from a particular sequence into any table).  So in the SQL install script I wrote to create the needed tables in Oracle (mirroring the install scripts for the other database engines present in the BugLogHQ install folder), I added lines to create sequences for each table, with each sequence name being the table name with "_seq" appended to the end of it.  I then added code to the _insert() function in the dbDataProvider.cfc to use the sequences for the primary key value when inserting a record:

  
<cffunction name="_insert" access="private" returntype="any">
  <cfargument name="columns" required="true" type="struct">
  <cfargument name="_mapTableInfo" type="struct" required="true">
  ...  
  <cfset var dbtype = variables.oConfigBean.getDBType()>
  <cfset var lstFields = structKeyList(arguments.columns)>
  <cfset var tableName = arguments._mapTableInfo.tableName>
  <cfset var seqName= tableName & "_seq">
  <cfset var pkeyName= arguments._mapTableInfo.PKName>
  ...
  <cfif dbtype eq "oracle">
    <cftransaction>	
      <cfquery name="qry" datasource="#DSN#" username="#username#" password="#password#">
        INSERT INTO #getSafeTableName(tableName)# (#pkeyName#,#lstFields#)
        VALUES (
        #seqName#.nextVal,
        <cfloop list="#lstFields#" index="col">
          <cfqueryparam cfsqltype="#arguments.columns[col].cfsqltype#" value="#arguments.columns[col].value#" null="#arguments.columns[col].isNull#">
          <cfif i neq listLen(lstFields)>,</cfif>
            <cfset i = i + 1>
          </cfloop>
        )
      </cfquery>
				
      <cfquery name="qry" datasource="#DSN#" username="#username#" password="#password#" result="qryInfo">
        select #seqName#.currVal as lastId from dual
      </cfquery>
    </cftransaction>
    <cfset newID = qry.lastID>
  <cfelse>
  ...

So if the dbtype value (which comes from the config/buglog-config.xml.cfm file) is "oracle", the Oracle insert code block will execute. The first cfquery block will insert the record, using the nextVal() function of the sequence associated with the table to get the next value of the sequence, while the second cfquery block retrieves the current/latest value of the sequence via Oracle's DUAL "table" (a construct designed to perform pretty much any utility operation that returns a single record or value).

The other issue I needed to address was adjusting some of the field data types.  Oracle's "varchar2" data type can only hold 4,000 characters of text; to store larger amounts of text, you need to use fields with the CLOB data type.  And in order to use cfqueryparam with such fields, you need to set the cfsqltype parameter of cfqueryparam to "cf_sql_clob".  So I updated the code in the entryDAO and extensionDAO CFCs to handle that (with the entryDAO.cfc code shown below):

<cfif variables.oDataProvider.getConfig().getDBType() EQ "oracle">
  <cfset addColumn("exceptionDetails", "cf_sql_clob")>
  <cfset addColumn("HTMLReport", "cf_sql_clob")>
<cfelse>
  <cfset addColumn("exceptionDetails", "cf_sql_varchar")>
  <cfset addColumn("HTMLReport", "cf_sql_varchar")>
</cfif>

After that, all that I had left to do was to add Oracle-specific conditional blocks to two other queries (ones that involved using database functions specific to each database platform) in two other files (components/hq/appService.cfc and components/lib/entryFinder.cfc), and I was done.

Had I done all of the changes I just described perfectly on the first try - which admittedly I didn't  :) - it would have taken me less time than it did to write this blog post.  And that's a mark of tight, well-designed application architecture, where certain key aspects of application behavior are centralized in a manner that lets you add functionality (in this case database engine support) by updating just a few files responsible for handling that particular task.

Tuesday, March 5, 2013

Need A CF App for Tracking Errors From Multiple Applications? Check Out BugLogHQ

Last month, during a brief lull in my work projects, I decided to tackle an issue I'd been putting off for awhile:  finding a better way of managing errors caught and reported by my ColdFusion applications.  All of my apps are designed to email me a full report of any errors that reach the global error handler, and while that means I'm immediately notified if there's a problem I need to address, the error message folder in my email account ends up serving as a de-facto error archive.  And now that we're (slowly) moving towards building applications as a team, it makes sense to have the errors stored in a centralized location.

After doing a bit of research, I ended up at the home page for the open-source bug logger BugLogHQ, created by Oscar Arevalo.  Based on the project changelog list, it sounded like it might have the features I wanted, but there wasn't a lot of explanatory documentation on the site and the screenshot images were thumbnails that couldn't be enlarged.  And it didn't support Oracle, which is our primary database engine at work (and a perusal of the Google Groups forum for BugLogHQ confirmed that).

Despite those factors, I decided it was worth trying to add Oracle support to the codebase so I could run it and try it out.  I'm glad I did:  BugLogHQ is a well-designed, robust application for managing errors in a way that will still let me keep track of what's happening with my apps.  Now that I've seen how it operates and what it can do, I'm kind of surprised that I had to do research to come across it:  either it completely slipped under my radar or it needs more publicity/exposure in the community.

Several things I like about BugLogHQ:

  • I like the fact that it's easy to get up and running.  Download the files, put them in a "buglog" directory under the webroot (or use a mapping), run the SQL install script for your database of choice (mySQL, PostgreSQL, MS SQL 2000/2005, MS Access, and now Oracle) update the config file with your datasource name and database engine, and simply point your web browser to that "buglog" directory.  After logging in (which forces you to change the default password for the built-in admin user account), you can verify everything's working by going into the settings area of the app and running the tests, which all mimic the methods your other applications (referred to in BugLog parlance as "client" apps) can use to transmit errors to BugLogHQ.  Simple and straightforward.

  • Just like most email clients have rules for filtering and acting on incoming email messages, BugLogHQ provides some rules for managing the errors that come in.  You can set up multiple "mailAlert" rules that will forward on particular errors (filtered by error type/severity, the source app's hostname or application name, or keywords in the configured error message text) to an email address of your choosing, or you can create a mailRelay rule that relays every error received to an email address.  And the emails sent out by BugLogHQ aren't just notifications about the errors:  they provide the full error details so you don't have to log into BugLogHQ to get more information.  There are also rules for discarding certain errors or for monitoring "heartbeat" transmissions from an app, so if the app is offline for a certain length of time BugLogHQ can report the problem.

  • The methodology BugLog uses to report errors is very well-designed.  If your client app is also a CFML app, you simply instantiate a single CFC (with settings for interacting with the BugLogHQ web service you want to utilize) in either the application scope or a bean factory, then call it with its notification function whenever you want to send information to the BugLogHQ app.  If the client app is reporting an error, you can send BugLogHQ a line of message text, the error struct (the raw "cfcatch" struct), the type/severity of the error, and a struct of any additional information you want as part of the report (like the affected user's ID or name). Here's how I called it from the main.error() controller function in the FW/1 application I used during my testing (where I've instantiated the CFC as a service object):

    public void function error(rc) {
        var extraInfo= {username= session.user.getUsername()};
        variables.bugLogService.notifyService("Error report from TestApp1",request.exception,extraInfo,"INFO");
    }
    

    All of those parameters are optional, so you don't need an error struct if you're reporting something that's a status or informational message rather than an error.  If there's a problem with sending the report to BugLogHQ, it'll fallback to sending an email containing all that information to whatever address you specify so the error doesn't get lost.

  • I also appreciate how BugLogHQ "eats its own dogfood".  If an error occurs in BugLogHQ itself, it'll record the error just like it would for any client app, and if the error occurs during the recording process it'll report the error via email.

  • BugLogHQ utilizes a scheduled task (with a default interval of 2 minutes) referred to in the app as the "BugLog Listener Service" to denote and process incoming error messages.  When the task fires, the error messages that have been received since the last run of the task are processed and then written to the error database.  If there's a problem with writing to the database (which I understandably encountered as I was tweaking the code to support Oracle), it'll maintain the errors in the queue until the next iteration (and you can view the contents of the queue within the BugLogHQ dashboard).  Sometimes you need to restart that service in order for certain changes to take effect. If you somehow forget to reactivate the service, it'll be restarted when it receives a new error report from a client app.

  • If one or more of your clients apps are NOT CFML-based web applications, there are library files provided that let you submit errors from PHP or Python apps, or straight from Javascript.  I haven't tried out those files yet, but we do have a few PHP apps in our shop now that could make use of the PHP option.

  • There are configuration options for tying BugLogHQ to a JIRA instance, providing error summaries via RSS or a digest email, and setting an API key to ensure that only your apps can submit data to BugLogHQ.

Bottom line:  if you don't yet have an error-logging application or other mechanism for storing and managing errors from your application(s), you should take a look at BugLogHQ.  Oscar and his contributors have done a great job with this application.

Thursday, November 29, 2012

Quick ColdFusion Tip: Use ClearParams() When Doing SQL Inserts in a Loop

Today I had the need to write code that would loop over a recordset, parse the data in each iteration, and then insert the transformed data into another table.  Nothing I haven't done countless times, but this time I was using the query functions in cfscript to do my inserts.  I knew the resulting code was going to be a bit slow (as inserting thousands of rows takes time), but when I ran it it was a LOT slower than I expected.

After adding some code to time the various parts of my routine, I discovered that the time it took for each insert transaction was steadily growing with each iteration of the loop, to the point where it was taking 500+ milliseconds per insert.  But why?

Then I saw the problem.  I had forgotten to invoke the query object's clearParams() function at either the beginning or end of my loop.  Apparently ColdFusion will let you create a query parameter with the same name attribute using addParam() - as was happening in my loop - and not throw an error (which is what I would have expected to happen), but it leads to a performance issue with the SQL execution.

In the few times where I've reused a query object with different parameters, I've been careful to use clearParams(), but I simply overlooked it this time.  Lesson learned.


Friday, October 12, 2012

Getting Out the Vote, ColdFusion-Style

Normally I don't blog about the actual ColdFusion web applications I create at the University of Maryland College Park (UMCP).  Most of them are extranet applications inaccessible to the public and computerize business processes that would take too long to explain.  But my most recent application doesn't fit the normal mold and it's received some attention from the local media because of what it does.

The application is an online application form for registering to vote in the State of Maryland in November designed specifically for our students at the university.  It was commissioned by our undergraduate Student Government Association (SGA) as part of a larger, multi-faceted effort to get out the vote this year, and supported by the university administration and the State Board of Elections (who provided the guidelines for how the data would be collected and sent to them).

The application runs on Adobe ColdFusion 9 and uses FW/1 as its application framework.  The model is comprised of record and service objects, all written in script syntax, with the service objects instantiated via ColdSpring.  Most of the client and server-side validation is handled by ValidateThis, and the application is styled with Bootstrap as well as some custom CSS and a bit of jQuery.

After reading the introduction page, students log into the application using our university's single-sign on solution.  As soon as they're logged in, the system pulls information about the student from our LDAP system.  That information is used to pre-populate certain form fields (name, date of birth, etc.) and it also affects the behavior of the application.  For example, if the LDAP information indicates that the student has a home ("permanent") address in Maryland that is different from their current on-campus / near-campus address, it will show both addresses to the student and let them choose which one they want to use as their residential/voting address. 

But if the student only has one Maryland address on file, they're only presented with one set of address form fields.  And in both cases, the addresses pulled from LDAP are formatted to conform to the way the state recognizes voter street addresses, making it more likely that the submitted address exactly matches an address on file with the state (that part took awhile: the state parses street addresses in a rather unique manner).

In short:  if the LDAP information is accurate and up-to-date, most students can complete the online registration without ever typing a key on the keyboard.

Perhaps the coolest part of the application is the last step prior to the review page.  In that step, the student has to acknowledge that they understand the legal requirements to vote.  They acknowledge this by clicking on a checkbox next to an image of their electronic signature.  When students enroll at UMCP and get their student photo ID, they write their signature on an electronic pad, and the signature is stored in binary format in a database table.  It was the fact that we had these signatures on file that made this project viable, because the new Maryland law that permits online voter registration made the submission of a signature a mandatory requirement.  And thanks to ColdFusion's image manipulation functions, rendering that binary data as an image takes but one line of code.

Admittedly, we did run into one issue with the signatures:  some of the older ones were stored in a proprietary format that couldn't be read outside of the ID card system.  But we found an option in that software that let us export large batches of those signatures as JPEG files, and from there I used ColdFusion's image functions to reduce each image to a reasonable size and write them to a new database table in binary format.

Once the student reaches the review page and submits their voter registration application, the form data is written to a table record and their electronic signature is output as a file to a directory outside the web root.  And every night a scheduled task runs that writes out all the new registration records to a data file in the format specified by the state and uploads that file and the related signatures files to a server run by the state.

And, like most of the applications I build, there is also an administrative interface that certain individuals can log into to view some anonymous registration statistics and to update the list of politicial parties currently recognized by the state (as they change from year to year).

The system went live October 1st, and as of right now over 1650 students have used it to submit voter registration applications.  The SGA is promoting the application at every opportunity and they're hoping to get to 2,000 registrations before the October 16th deadline.  While that might not seem like a huge number, I believe it would be the highest number of on-campus registrations since the SGA started doing voter registration drives several years ago.

Once we hit the October 16th deadline, we'll shut down the application until after the election has past, then reopen it.  The goal is to let the system accept registrations year-round, and I already have a few small improvements planned based on user and stakeholder feedback.  I also need to add a tool or two to the administrative interface so the stakeholders can run the system without my help. 

But otherwise, I'm pretty happy with how it turned out, and so are the SGA and the other stakeholders.

Sunday, July 29, 2012

Technique For Adding Basic CSRF Protection in a FW/1 Application

Just over two years ago, I wrote a blog post about how I protected my web applications from cross-site request forgery (CSRF) attacks using Model-Glue's event types feature.  Recently, I've started building ColdFusion applications using the Framework One (FW/1) MVC framework, so I needed to come up with a new approach to try and block CSRF attacks. Ideally, I wanted to do it in such a way that once I had my CSRF protection set up, I didn't have to think about it anymore, that I wouldn't have to remember to add one or more lines of code to each action I wanted to safeguard (and risk overlooking an action or two).

First, a refresher on what CSRF is: it's an attack where the hacker is counting on the user still being logged in/authenticated to the web application he's targeting.  The hacker creates a web page that posts data to the target application using a known URL or form submission destination and lures the user to that page.  When the user triggers that page, whatever data that page sends to the target application is accepted because the target application sees it as a valid request from a valid user.  It's a serious vulnerability, which is why ColdFusion 10 comes with new functions designed specifically to help block CSRF and why those functions were included in the CFBackport project (an open-source project that makes some ColdFusion 10 functions available to ColdFusion 8 and 9).

The basic way to prevent CSRF attacks (or at least make them far less effective) is to generate a unique value that is stored in the user's current session, include that value in the URL or form submissions you want to protect, and then match the value in the URL or form submission to the value stored in session and make sure they match before allowing the action to proceed.  So unless the hacker can figure out what that unique value currently is for a particular user, they cannot mimic it in their fake web page and data from that page won't be accepted.

So first I added code to my controller function in charge of validating user authorization that would create a token variable in the session:

...
session.user= arguments.rc.user;
session.token= CreateUUID();
....


At this point, I could have manually started adding the token variable to URL strings or placed it in hidden form fields in my forms, but again I wanted my CSRF to be as "automatic" as possible.

In FW/1, the best practice for creating URLs for hyperlinks and form submissions within the application is to use the buildUrl() function built into the framework.  With buildUrl(), the following line of code:

<form name="addItem" method="post" action="#buildUrl(action='item.add',queryString='foo=2')#" >


...gets rendered as (assuming you've stuck with the FW/1 defaults)...

<form name="addItem" method="post" action="index.cfm?action=item.add&foo=2" >


The buildUrl() function lives inside the framework.cfc file that is the heart of FW/1.  Implementing the FW/1 framework in your application is as simple as changing your Application.cfc to extend that framework.cfc file.

I wanted buildUrl() to automatically incorporate my session.token (if it existed) in the resulting URL. So to do that, I created a subclass of framework.cfc called frameworkExt.cfc with the following code:

component extends="framework" {
    public string function buildURL( string action = '', string path = variables.magicBaseURL, any queryString = '', string tokenKey= "token") {

        //check for presence of tokenKey in session
        if(StructKeyExists(session,tokenKey)) {
            if(isStruct(arguments.queryString)) {
                arguments.queryString[arguments.tokenKey]= session[tokenKey];

            } else {

                if(arguments.queryString== "") {

                     //If the action has the url query elements hard-coded (which means queryString should be empty), append to that
                     if(ListLen(arguments.action,"?") GT 1) {
                         arguments.action &= "&#arguments.tokenKey#=#session[tokenKey]#";
                     } else {
                         arguments.queryString= "#arguments.tokenKey#=#session[tokenKey]#";
                     }

                } else if(ListLen(arguments.queryString,"?") EQ 1) {
                    arguments.queryString &= "?#arguments.tokenKey#=#session[tokenKey]#";

                } else {
                    arguments.queryString &= "&#arguments.tokenKey#=#session[tokenKey]#";
                }

            }
        }

        return super.buildUrl(arguments.action,arguments.path,arguments.queryString);
    }
}


Basically, I created a new version of buildURL() that acts as a kind of pre-processor to the original buildURL() function. If session.token exists, it will get incorporated into the URL just as if I had explicitly submitted it to buildURL() in either the action or queryString parameter, then transformed into the final URL by the original function in the super class.

(Some caveats here...I don't know for certain if this technique would work for every use case of buildURL(). It's a complex function capable of creating URLs in a number of different formats in order to produce SES-style links and point to subsystems. But I would think that since I'm simply adding in another URL variable that it ought to work in every case. Also, any time you write a function that modifies a framework function (even via extension) you run the risk of that framework function changing in a future version, potentially breaking your modification).

Once I changed my Application.cfc to extend my frameworkExt.cfc instead of framework.cfc and reloaded my application, the session token became part of all of the URLs I visited or invoked as an authenticated user.

The final step was to add code that would check the token value submitted in the URL or form against the value of session.token, and if it didn't redirect the request to an error or login page.  In Model-Glue, I could add that check as part of a message broadcast in an event type, and then apply that event type to any request where I wanted to enforce CSRF protection.  FW/1 doesn't have event types, but it has something similar:  in an FW/1 controller, you can create before() and after() functions that execute code (you guessed it) before and after the processing of each function in that controller.  So if I wanted to check the submitted token against the session token before every page request that invoked a function in my "widgets" controller, I could put that code in the before() function.

That would have been the conventional way to go about it, but I decided to do it a bit differently in my application.  Since I wanted to add CSRF security to any action undertaken by an authenticated user, and all of my unauthenticated requests were handled by a small set of controllers, I decided to do a conditional check on the session token in the setupRequest() function in Application.cfc (setupRequest() being a function inherited from framework.cfc that runs at the start of each request):

function setupRequest() {

    if(!ListFind("main,auth",getSection())) {
        controller("auth.checkSessionSecurity");
    }

    if(StructKeyExists(session,"user")) {

        if(!StructKeyExists(rc,"token") OR rc.token NEQ session.token) {
            controller("main.notAuthorized");
        }
        rc.user= session.user;
    }
    ...
}


The FW/1 getSection() function returns the section value of the request (in FW/1, the section equates to / matches up with a controller CFC of the same name), so the first if statement basically states that unless the request is invoking the main or auth controller, the action should redirected to the checkSessionSecurity() function of my auth.cfc controller, which in this application makes sure the user has authenticated and a user object exists in session.

If a user object does exist in session, that means session.token should exist (since it's added to the session at the same time the user object is). So the nested if statement verifies that a token variable was submitted via URL (and hence appears in FW/1's rc struct) and that its value equals that of session.token, and if either of those conditions fails then the user is kicked out to an error page and prevented from executing the original request.

So with this setup, I get protection from CSRF attacks simply by using buildURL() as normal and putting all of my sensitive controller functions in controllers other than main or auth.

Some Additional Notes

  • The drawback to having URLs in your application that change with every user session is that it can interfere with behavior testing using automation tools like Selenium IDE, because any token value captured during the creation of your testing script will be invalid the next time you run them.  One way you can get around this is to add conditional logic to the code that that determines if the application is running in your local development environment (your own machine or a test server), and if so sets the session token value to the same value each and every time (regardless of user session), giving you an unchanging URL in your test environment that you can record in automation scripts.

  • If your application has access to very sensitive personal or financial information, you may want to take your CSRF security a step further.  Some applications rewrite the session token value every few minutes instead of leaving it the same during the user's authenticated session.  You should be able to modify the technique described in this post to do that if you feel it's warranted.

Friday, May 25, 2012

Converting Letters in Phone Numbers to Their Corresponding Digits

In a recent post, I mentioned that the feature that allows a user to tap on a phone number in their smartphone web browser and dial that number doesn't work if the phone number contains letters.  Well, some of the phone numbers in the database tables I'm working with contain letters (usually to spell out building abbreviations) so I needed to convert those letters into the corresponding digits on American phones (apparently it's not an international standard).

Before writing my own function to do this, I did some Googling and was a bit surprised to find that while folks have written routines in CFML to strip out dashes and such, no one had really written (and then published) a routine for this task.  So here's mine:

(Shrug) Nothing fancy, but it works. If you need to do additional adjustments to the phone number (like I did), you can just add them to this function or put them in separate functions (which is probably better).

Sunday, May 20, 2012

Post-cf.Objective() Thoughts

Just got back home from cf.Objective().  During the plane trip home, I wrote down a few paragraphs about the sessions I attended that I'll share now before kicking back for the rest of the day:

  • Marc Esher's session on threads and concurrency was excellent.  If you implement or plan to implement concurrent code execution in your CFML applications, you need to look at the CFConcurrent library he developed (available on RIAForge and GitHub).  The library utilizes the Java Concurrency Framework (JCF) and makes it possible to return results/data from with a thread (something you can't do with <cfthread>), schedule/defer threaded actions, and set up "threading within threading."

  • Nathan Strutz provided so much information and so many examples of using LESS to manage and generate CSS that I missed a few things trying to take notes.  No worries, though: he put up everything from his presentation on GitHub, including a number of examples and demos that show you some best practices on how to add LESS compilation into your development and production workflow.  And not long after the session, Matt Gifford made his own contribution to the LESS toolset:  a CF Builder extension that lets you do the compiling within the IDE.

  • Curt Gratz's session on mocking covered the reasons why you should mock data and objects when you unit testing, then showed attendees how MockBox makes it easy to mock function calls and their results on the fly.  As someone still finding his way regarding unit testing, I found his one walkthrough on how to make sure you're always testing a single function, and not a parent or dependent function, very helpful.  And even though MockBox is part of the ColdBox family of projects, it can be run as a standalone product, so you can make it part of your unit testing strategy regardless of what framework you use.

  • Billy Cravens also did an excellent job with his session on authenticating users via social networks.  Adding Google, Facebook, and Twitter-based authentication to your site is really now just a matter of getting an API and private key for your site from those services and making use of the available.  His demo code, available on GitHub, shows examples for all three service providers within a simple application built with the FW/1 framework.

  • I attended Denard Springle's multi-factor authentication workflow session mostly out of curiosity, as it's not something I can really implement with my particular user base.  But he showed us his technique of securing URL and form variables submissions, which involves hashing the variable names and encypting the variable values.  That's something I've never seen anyone else do.  Slides from his demo that illustrate that technique are available from his collection of presentation slide decks (look for the "Multi-Factor Authentication" one).

  • A room for conducting ad-hoc discussions or coding sessions was provided, and I ended up hosting a half-hour session on CFML applications in higher education.  The seven or so of us described some of the applications we've worked on, and as I suspected there was quite a diversity of applications, mostly built in support of the administrative processes at our schools rather than the educational process itself.  But I did learn that a few of us use (or are in the process of implementing) the Jasig CAS single sign-on tool, and that there would be interest in having some kind of robust form/survey tool (possibly with plugins like one to handle online payments) that we could set up such that non-programmers could create what they needed from it.  The question was raised as to whether it would make sense to augment Mura CMS to create such a thing.  We didn't discuss or make any further plans beyond that, so whether the discussion will continue in some form (move further forward) online remains to be seen.

As my conclusion, I will say that the conference was excellent as always (hardly a unique opinion, I know).  I've been to cf.Objective() before (in 2008), but this was my first time attending at the current venue, which is the Nicolett Mall area of Minneapolis.  It's a very pedestrian-friendly area of the city, and with the near-perfect weather we had it was quite lively.  It gave us a lot of options for dining and socializing after the sessions, and being able to hang out with other members of the community is one of the great benefits of the conference.

Sunday, December 4, 2011

Announcing tableSnapshots: A ColdFusion Tool For Preserving and Reverting Database Table Data

Several months ago, I was doing some functional testing on a web application that was taking forever. Each run of the test resulted in changes to the data in several tables, and in order to reset the test I had to go into the tables and undo the changes. It occurred to me that it would be nice to have a tool or script that could preserve the current table data and then later write that version of the data back to the tables.

That marked the beginning of the tableSnapshots tool.

Creating the initial version of the tool just to suit my own needs was quick and easy compared to the work I've put into the tool since then to make it worth sharing, but I'm pretty happy with the result.  It's essentially a small web application that you can drop into any folder on your ColdFusion-enabled (ColdFusion 8 or 9) web server. Once you update the configuration settings in its Application.cfc file with the name of your datasource, the tool enables you to:

  • Take a "snapshot" of one or more of your database tables, storing all of the current table data as JSON data in a text file (NOTE: this tool will not work on tables with binary data fields).

  • Replace the current data in a table with the data stored in a snapshot, creating a backup snapshot of the data being replaced in the process.

  • View the data in a snapshot or backup snapshot in a jQuery-enhanced table that allows you to sort and filter the data.

  • Delete older snapshot and backup snapshot files.

All of this functionality is available via a web interface.  Creating a snapshot is as easy as clicking on the "Create" menu option, selecting the tables from your datasource that you want to generate snapshots from an HTML table (enhanced with the jQuery Datatables plugin), and clicking a button.  You reload the data from one or more snapshot files in the same fashion (though of course reloading the data takes longer), and you can view the data stored in any snapshot or backup file in tabular format.  The tool even makes it easy to delete snapshot and backup files you no longer need so you don't have to manually delete them from your file system.

The tool serializes the table data using the functions provided in the JSONUtil project because the "strictMapping" option provided by JSONUtil avoids the data conversion issues that can occur with the native ColdFusion JSON functions (such as strings being converted to numbers and "true"/"false" string values being converted to "yes/no").  However, it uses the native JSON functions for deserializing the data because they seem to perform better when working with large data sets.

This tool was built and tested on ColdFusion 9.0.1. It should work on Adobe ColdFusion 8, and perhaps other CFML engines as well, but it has not been tested in those environments. It relies on the <cfdbinfo> tag to acquire the data types of the table fields it processes, so access to that tag is a requirement.

The current version supports Apache Derby, MySQL, and Oracle:  there is one .cfc file in the tool for each of these databases that tells tableSnapshots how to map the data stored in JSON format to the relevant table fields during the snapshot reload process. So adding support for additional databases simply means writing similar .cfc files and placing them in the main tool directory. Further details about how tableSnapshots works and what configuration options are available are described in the "Technical Details" page within the application itself.

As I said at the beginning, the original purpose of tableSnapshots was to make it easy to rollback data in multiples tables during testing.  But there are a couple of other potential uses as well:

  • You could use it to simply track changes to data over time (since each snapshot file is timestamped).

  • If for some reason you don't have an IDE or database client program that lets you browse table data, you can create snapshots and view the data with the snapshot view option (which gives you the ability to sort and filter the data).

  • You can use it to copy table data from one type of database server to another.  I used it for this purpose myself:  I made a snapshot of the data, created a similar table with a different name on the other datasource, renamed the snapshot file to match that different name, reconfigured and reset tableSnapshots to interact with the new datasource, and "reloaded" the snapshot data into the new table.

  • If your development database isn't being backed up as well or as often as you'd like, you could use the snapshots as your own backup.

  • You can create snapshots as data for use while offline or in mock objects. tableSnapshots comes with a mini-tool in the "tools/jsonasquery" subfolder that can be used to pull snapshot data into a query object.

I do want to be clear that tableSnapshots is meant for use as a development tool.  While there's no risk of data loss when taking a snapshot, reloading snapshots involves deleting data and no software is perfect, so make sure you take additional steps to safeguard any data that you're afraid to lose.

tableSnapshots is available for download from both RIAForge and GitHub, so have at it!

Friday, June 10, 2011

For CFSelenium Users: An Ant Script to Transcribe Your Tests For Multiple Browsers

The easiest way to create a CFSelenium test case is to use the Selenium IDE plugin for Firefox to compose the test, then export the test using the export formatter Bob Silverberg included in the CFSelenium project.  You end up with a test that can be run against Firefox but can be further customized to your needs.

Of course the beauty of CFSelenium is that it lets you run those tests against browsers other than Firefox, to conduct cross-browser testing.  But who wants to create multiple copies of the original tests, or edit the test files whenever you want to check them against another browser?

Not this guy.

So I went ahead and created an Ant script that will take the CFSelenium tests generated for Firefox and transcribe them to work for other browsers I wanted to test against.  The script includes configuration properties that allow you to customize the browser settings to your environment.  For example, I needed the script to be able to rewrite my Internet Explorer tests to run IE on a virtual machine rather than on localhost.  I also took what I learned about capturing screenshots using CFSelenium and added a nice screenshot management feature to the script:  if you add one or more captureScreenshot or captureEntirePageScreenshot statements to your tests, the script will make sure you're using the correct statement for the particular browser, will rewrite the statement to place the screenshot files in a particular directory, and will add code that will incrementally name the screenshot images so you can take and preserve multiple screenshots for one or more tests.

I've put this Ant script up on GitHub at https://github.com/bcswartz/CFSelenium-Cross-Browser-Converter-Ant-Script.  The Ant file itself provides a lot of guidance on how to configure and use the script and some hints on using CFSelenium in general.  Hopefully it's usable even by folks who aren't completely comfortable with Ant.  I myself am still something of an Ant noob:  I'm sure there are more elegant ways of writing this script, and Ant gurus are welcome to fork the GitHub repo and make improvements.

Tuesday, May 24, 2011

CFSelenium News: No Need To Start Selenium Server Separately Anymore

In my earlier blog post on how to install and run CFSelenium, my steps included directions on copying the .jar file for the Selenium-RC/Selenium Server application to an easily accessible location and then starting your CFSelenium testing session by executing that .jar file from the command line.

I'm happy to report that anyone using CFSelenium in conjunction with ColdFusion 8 or 9 can skip those particular steps.  Marc Esher (of MXUnit fame) recently contributed code to the CFSelenium project that enables CFSelenium to start the Selenium Server (if it's not already running) anytime you run a test, and stops the server once the test is complete.  This code is now part of the latest version of CFSelenium that can be download via the CFSelenium GitHub page.

Unfortunately, when I revised the tag-based, CF 7/8-friendly versions of the CFSelenium files to incorporate Marc's code and ran it against CF 7, I found that CF 7 apparently could not start and stop the Selenium Server via the new code.  So ColdFusion 7 users will still have to start Selenium Server from the command line, but otherwise CFSelenium still works in CF 7.

Monday, May 23, 2011

Integrating Mura with the Jasig Central Authentication Services (CAS)

I've already posted most of this information on the Mura forums, but I wanted to post it here as well for anyone looking for information on this topic.

With the blessings of my boss, I've been playing around with the ColdFusion-powered Mura content management system to see if it might be a good CMS option for us.  From what I've seen so far, Mura is a well-thought out CMS system that is both powerful and easy to use, which is a difficult balancing act.

One of the things my boss wanted me to investigate was whether or not we could tie Mura in with our single sign-on solution, which is CAS (Central Authentication Service), a Jasig project originally created at Yale.  When a user tries to access a page or a site that requires them to authenticate, they are redirected to the CAS server and enters their LDAP-based user id and password on the CAS login page.  If they successfully authenticate, the CAS server redirects them back to the original site and stores a token as a cookie in the user's browser.  If the user visits a different website secured by CAS, the cookie allows them access to that site without the need to log in again.

Mura provides a plugin architecture that allows developers to intercept certain Mura events and run their own code.  A number of Mura shops have created plugins that intercept the Mura login events in order to tie in with their in-house directory and authentication servers, but those login events are triggered by the admin and user login forms built into Mura.  I couldn't go that route:  I needed to circumvent and replace the Mura login form(s) with the CAS login form and have Mura log in the user based on the credential information returned by CAS.

After some digging into the code and some trial-and-error, I came up with a way to authenticate Mura administrators via our CAS system.  First, I created admin user accounts in Mura where the username matched the username/user identifier returned by a successful CAS login.  Then I created a Mura plugin that would fire with the OnGlobalRequestStart event with the following event handler:


...The code in this plugin will only execute if the user navigates to /admin/index.cfm (without any URL query parameters) and the "mura" struct in the session scope contains an empty userId key.  Without these conditionals, the login code will run at times when you don't want it to, like when the user is trying to log out or when saving page edits (apparently saving content changes involves navigating to the admin/index.cfm page without URL query parameters).

The NetId is the user identifier returned by CAS.  If it's not found in the session scope, the action is redirected to adminCASLogin.cfm, a variation on the CAS authentication script posted on the CAS website (https://wiki.jasig.org/display/CASC/ColdFusion+client+script).  The user enters their username and password on our CAS login form page, and if the log in is successful the adminCASLogin.cfm page copies the NetId to the session scope and uses cflocation to go to admin/index.cfm.

Now that the NetID exists in session, the plugin queries the tUsers table (the Mura database table containing, well, user records) for an admin account with a username that matches the NetId and gets back the Mura userId for that person, and provides that userId along with other values to the loginManager's loginByUserID() function.  The admin user ends up in the administrative Dashboard, logged in and ready to go.

The one drawback to this method is that when a user logs out, they are presented with the normal Mura admin login form, which can be a little confusing.  But without knowing the password to their Mura user record, they would still have to log in via CAS.

I wrote a similar plugin for requiring CAS authentication to access a particular Mura site (an "internal" site only viable to authorized personnel).  In this case, the event handler executes in response to the OnSiteRequestStart event:


...in this case, I had to create my own session variable (session.userId) for denoting if the user had already authenticated via CAS.  The siteCASlogin.cfm file is pretty much the same as the adminCASLogin.cfm file in the first example except that when it completes the CAS authentication it uses cflocation to return to the index.cfm page of the site (rather than admin/index.cfm).

If the user successfully authenticates via CAS and has any sort of Mura user account, they will be granted access to the site, and if they are a Mura admin they will be logged in so they can edit the site if they wish.

Sunday, April 3, 2011

Quick Tip: Controlling Execution Speed in CFSelenium

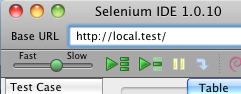
When you use Selenium IDE to play back the actions you've recorded on a web page (the clicks, the text input, etc.), you can control the waiting period between the execution of each command using the slider control on the left end of the tool bar:

With CFSelenium, the way that you control the time period between executions is with the setSpeed(string milliseconds) function.  Once you set the execution speed with this function, the time period between executions will remain set at that length until you use setSpeed again.  So you could set the speed once within the setUp() function of your MXUnit test case...

public void function setUp() {
    browserUrl = "http://local.test";
    selenium = new CFSelenium.selenium(browserUrl, "localhost", 4444, "*firefox");
    selenium.start();
    selenium.setTimeout(30000);
    selenium.setSpeed("1000");
}


...or you could alter the speed within a test case function...

public void function testFormValidation() {
    selenium.open("blah/index.cfm?event=addEditUser&userId=12");
    selenium.setSpeed("3000");
    //Now Selenium will wait 3 seconds between each of the following command statements
    selenium.type("firstName", "John");
    selenium.type("lastName", "White");
    //Setting the speed back down to 1 second
    selenium.setSpeed("1000");
    ....
}


Knowing how to change the speed in CFSelenium is crucial if you're testing any sort of operation that might take a second or two to update the page, like an AJAX call that populates a drop-down box:  if the next command in your test requires that drop-down box to be populated, but CFSelenium tries to run that command before the AJAX call completes, either your test will fail or you'll get an error message from Selenium.  The setSpeed function lets you slow down the execution speed so your AJAX calls have time to do their work before the next step in the test.

Monday, March 28, 2011

Taking Screenshots with CFSelenium

In addition to doing browser behavior testing, there are four functions in CFSelenium that you can use to capture screenshots.  The first two are:

captureScreenshotToString(): captures a shot of your current monitor display in .png format and returns the image data as a base-64 encoded string. **

captureScreenshot(string filename): captures a shot of your current monitor display in .png format and writes the image data to the filename passed in as the argument.  The filename parameter must be a full path ending in a filename, like "C:\Data\Screenshots\screenshot1.png." **


**These two functions work for all supported browsers, but because they take an image of the entire monitor screen, the browser window launched by *CFSelenium may be obscured by other windows on your monitor, and sometimes CFSelenium (or more specifically the Selenium Server) places the browser window in the lower half of the monitor, cutting off the view of the lower half of the window.

The other two screenshot functions capture only an image of the web page in the browser launched by CFSelenium, and they capture that page in its entirety: even if the page is long enough to scroll for several screens, all of that content will be captured.  While that can make for some very elongated images, it does capture all parts of the page.  But unlike the first two functions, these can only be used with certain browsers:


captureEntirePageScreenshotToString(): captures the entire web page in .png format and returns the image data as a base-64 encoded string.  Only works when used with Firefox.

captureEntirePageScreenshot(string filename, string kwargs): captures the entire web page in .png format and writes the image data to the filename passed in as the first argument.  The filename parameter must be a full path ending in a filename, like "C:\Data\Screenshots\screenshot1.png." The second argument is a string that modifies the way the screenshot is captured.  At the moment, it can only be used to alter the background of the HTML document object of the page.  An empty string can be passed as the argument, like so:

selenium.captureEntirePageScreenshot("C:\Data\Screenshots\screenshot1.png","");


The captureEntirePageScreenshot works when used with Firefox.  You call also use it with Internet Explorer with a helper program called snapsIE if you do the following:

  1. Go to http://snapsie.sourceforge.net/ and click on the "snapsie-0.2" link to download the file. The file is a compressed .tar.gz file, so you will need a program that can extract the files from that package (Mac OS X can open it as if it were a .zip file).

  2. Ignore the first of the bullet points on the http://snapsie.sourceforge.net/ page but follow the rest of them to register the snapsIE .dll file.

  3. The last of the bullet points alludes to the fact that the security restrictions regarding ActiveX controls can block the use of snapsIE. In experimenting with it, I ended up making the following changes to Internet Explorer's security settings under "Internet Options":

    • Automatic prompting for ActiveX controls: Disable

    • Run ActiveX controls and plug-ins: Enable

    • Script ActiveX controls marked safe for scripting: Enable

    (Even after making those changes, the first time I had CFSelenium try to capture a acreenshot with IE, I had to watch the test run and click on the prompt at the top of the web page and tell IE to allow the snapsIE script to run on all sites.)

  4. When you instantiate the CFSelenium object to run the test that will take the screenshots, make sure you use "*iexploreproxy" as the browser string instead of the regular "*iexplore"


...The ability to take screenshots with CFSelenium lets you use CFSelenium to test the look of your web pages in other browsers in addition to testing how the page behave. And if you have a need to generate a portfolio of screenshots for a client, using the captureEntirePageScreenshot function could save you some time with that task.

Sunday, March 27, 2011

Using CFSelenium With The Most Common Browsers

When using CFSelenium to send Selenium commands to the Selenium Server, you start off by instantiating CFSelenium as an object.  If you're using the ColdFusion 9 version, you would instantiate it with a statement like this:

browserUrl= "http://www.cnn.com";
selenium = new CFSelenium.selenium(browserUrl);


If you're using the ColdFusion 7 or 8 version, you might instantiate it like so:

<cfset var browserUrl= "http://www.cnn.com" />
<cfset variables.selenium= CreateObject("component","CFSelenium.selenium_tags").init(browserUrl) />


In both cases, you're calling the init() function of the respective CFSelenium .cfc file. The init() function can take 4 arguments:

  • browserURL: (required) the URL of the website (just the address to the webroot, not to any subfolders) you want to run the Selenium commands against.

  • host: (optional) the IP address or hostname of the machine running the Selenium Server instance CFSelenium will be communicating with. The default value is "localhost"

  • port: (optional) the port number used to communicate with the Selenium Server instance. The default is 4444.

  • browserStartCommand: (optional) a string that tells Selenium which web browser on the machine running the Selenium Server instance to use. The default value is "*firefox"

By default, CFSelenium uses Firefox to conduct the browser tests (which makes sense because most of the time you'll use the Selenium IDE Firefox plugin to create your tests). In order to have CFSelenium run a test case through a different browser, you'll have to pass a different browserStartCommand string into the init() function.  You can see a list of the different browserStartCommand strings in this post on StackOveflow:  http://stackoverflow.com/questions/2569977/list-of-selenium-rc-browser-launchers.

Sometimes it's just that simple, but sometimes it's not...and when it's not, it can be a real pain to figure out.  WIth some trial and error, I was able to get Selenium Server/CFSelenium to interact with all of the browsers I had installed on my Windows and Macintosh laptops.  Here's what I had to do it each case:

Firefox

Windows 7: The typical browser string shorthand for starting Firefox ("*firefox") only works if Selenium Server can use your operating system to find out where the browser executable file is. Because Firefox isn't documented in my Windows 7 PATH envionment value, I had to add the full path to the firefox.exe file in the browser string. So my CFSelenium instantiation statement ended up looking like this:

selenium = createObject("component","CFSelenium.selenium").init("http://www.cnn.com","localhost", 4444, "*firefox C:\Program Files\Firefox\firefox.exe");

Mac OS X: The default/regular Firefox browser string "*firefox" worked just fine.

Google Chrome

Windows 7: The regular "*googlechrome" browser string worked fine.

Mac OS X: The regular "*googlechrome" browser string worked fine.

Safari

Windows 7: Safari comes with a pop-up window blocker that is turned on by default, and while on it will prevent the Selenium Server from doing anything beyond opening the browser window. To turn off that blocker in the Windows version, click on the gear icon in the upper right corner and click on "Block Pop-Up Windows" to uncheck it. Once I did that, I was able to run Safari using the "*safariproxy" browser string (it wouldn't take the regular Safari browser string) and specifying the location of the Safari executable file (similar to what I did with Firefox).

Mac OS X: Once I turned off the pop-up blocker (by clicking on "Safari" in the menu bar and unchecking "Block Pop-Up Windows"), I was able to run Safari with the normal "*safari" browser string>.

Opera

Windows 7: Although Opera 9 was the last version of Opera officially supported for the Selenium Server, I was able to run Opera 11.01 using the "*opera" string and specifying the location of the opera.exe file.

Mac OS X: This was the hardest one to figure out. Here's what I ended up doing:

  • I had to define a proxy server in Opera that would accept the commands coming from the Selenium Server using the following steps:

    1. In the Opera menu bar, I clicked on "Opera" and then "Preferences".

    2. In the Preferences window, I clicked on "Advanced", then choose "Networks" from the column of options on the left, then clicked on the "Proxy Servers..." button.

    3. In the Proxy Servers window, I put a checkmark next to "HTTP", entered "localhost" in the text box to the right of the "HTTP" checkbox, and entered "4444" in the corresponding Port box.

  • I could not use any of the Opera-specific browser strings. I ended up having to use the "*custom" browser string and specify the location of the Opera executable...which is NOT the "Opera.app" listed in the Application folder but a file within that application package/folder:

selenium = createObject("component","CFSelenium.selenium").init("http://www.cnn.com","localhost", 4444, "*custom /Applications/Opera.app/Contents/MacOS/Opera");

Even after all that, the behavior was still a bit flaky. Sometimes Opera would start with a dialog box asking if you wanted to restore the last session (as if Opera had crashed after the last session). Sometimes Selenium wouldn't proceed past the "Speed Dial" Opera startup page: telling Opera to use an actual homepage helped but that setting change didn't seem to take effect upon the next startup of Opera but rather the startup after that.

Internet Explorer 8

Windows 7: I wasn't able to use the regular "*iexplore" browser string, but "*iexploreproxy" worked fine (and with IE being part of the OS, I didn't need to specify the path to the executable).

Mac OS X: If you're running virtual machine software (I use VMWare Fusion) on your Mac in order to run a Windows environment, you can run your CFSelenium tests against IE running in that VM by doing the following:

  • Place a copy of the Selenium Server .jar file on your VM instance of Windows just as you did when you installed CFSelenium on your Mac.

  • Find out what the IP address of your VM instance is. The easiest way to do that is to open a command-line interface in Windows (by clicking the Start button, choosing "Run...", typing "cmd" in the text box and hitting the Enter key), and typing "ipconfig -all" to get the current network statistics for the Windows instance: you want the address under "IP Address".

  • Use the command-line interface to start the Selenium Server on your Windows instance (just as you would do on your Mac).

  • Instantiate CFSelenium using the IP address of the Windows VM and "*iexplore" as the browser string. So if the IP address of your Windows VM is 172.16.9.9, the instantation statement would look like this:

selenium = createObject("component","CFSelenium.selenium").init("http://www.cnn.com","172.16.9.9", 4444, "*iexplore");

When you run CFSelenium against the Selenium Server on your Windows VM, you'll see the Selenium Server on the VM doing all the work, even though the test results will be reported back to whatever browser you're using to run the test on the Mac side.

...This was how I got all the browsers to run with CFSelenium on my computers. It may be different for your computer(s), but hopefully the information I've provided here will at least be of some help.

Brief Guide to Testing Browser Behavior with Selenium IDE and CFSelenium

The Selenium IDE Firefox plugin makes it easy to record the actions you perform on a web pages or series of web pages as a set of commands.  You simply open the Selenium IDE tool from the "Tools" menu in Firefox, make sure the Record button (the red circle in the upper right) is active, and then click and type away.  Once you've stopped recording, you can re-run the the recorded steps any number of times and even save the steps as a test case file to run again later.

Simply recording your actions as described above can be useful when you're troubleshooting a browser behavior (usually a Javascript function) that only executes after you've changed certain form fields or performed particular actions:  it saves you the time of constantly reloading the page and manually going through the actions again.  But you don't end up with an actual verifiable test:  you're verifying whether or not the page is behaving correctly by visually observing the outcome each time.  In order to use Selenium (and especially CFSelenium within the context of MXUnit) as a true testing tool, you need to add verification and assertion statements into your Selenium recordings.

Fortunately, it's easy to add such statements with Selenium IDE.  If the browser behavior results in a visible change to the page (like updating text in a form field), right-click on the changed part of the page.  At the bottom of the context menu that appears will be several Selenium commands you can choose to add to your current recording.  One or more of the commands will be a "verify" or "assert" command that you can add to your recording that basically means "return true if this page element contains this value or this text; return false if not".

Take the example below.  If the user selects "College" from the first select box on the bottom line, an AJAX call is made that populates the third select box on that line with the acronyms of the various colleges.  When I right-click on that third select box, I can select the verification command that verifies whether or not the select box contains all of the acronyms (you can see all of the text labels for the options in the select are concatenated together).  Other verfication and assertion commands for the element you selected might also be available under the "Show All Available Commands" option at the bottom of the context menu.

It's these verfications and assertions that you save in your recording that form the basis for your testing with CFSelenium and MXUnit.  When you export your Selenium recording as a CFSelenium/MXUnit test case and then run it, MXUnit is going to receive the results of the verifications/assertions from the Selenium Server and report the test case as having passed or failed based on those results.  When your CFSelenium/MXUnit test case passes in Firefox, you can then use CFSelenium to run the test case against other browsers and see if it passes or fails.  If it fails in Browser X, you can look at the test results to see which verifications/assertions failed and then figure out how to modify your page's behavior/Javascript so that it works in that Browser X...and once it works in Browser X, you'd re-run the test for Firefox and the other browsers to make sure the newly modified page still passes the tests in those browsers.

If you're running CFSelenium on ColdFusion 8 or 9 in conjunction with MXUnit, you can add MXUnit debug() statements to your test cases to retrieve additional information from the test (beyond the success or failure of the verifications or assertions).  For example, you could add the following line to your MXUnit test case to retrieve all of the text on the web page used in the test:

debug(selenium.getBodyText());


For more information about the debug() statement, consult the MXUnit documentation. For more information about what kinds of data CFSelenium can return from the test, look through the functions and read the hints in the relevant CFSelenium .cfc file (selenium.cfc for ColdFusion 9, selenium_tags.cfc for ColdFusion 7 and 8).

Quick Guide for Installing and Running CFSelenium

I've been playing around with CFSelenium this week in order to come up with an implementation that will let me easily replicate and run tests I've created with the Firefox Selenium IDE plugin on multiple browsers.  I've learned a few things along the way that are worth blogging about, but I thought I should start with a blog post on how to get CFSelenium up and running quickly.


Installating CFSelenium

  1. First, you need to have a computer that has either ColdFusion 7, ColdFusion 8, or ColdFusion 9 installed and running such that you can call and execute a .cfm page on the machine (example "http://localhost/myLocalSite/index.cfm"), and you'll need Firefox installed.
  2. Go to Bob Silverberg's CFSelenium GitHub site - https://github.com/bobsilverberg/CFSelenium - and click on the "Downloads" button.  In the pop-up window that appears, click one of the two buttons under "Download source" to download either a .tar.gz archive or a .zip archive, and download the file to your computer.
  3. Extract the files and folders from the downloaded file wherever you like to start with - let's say a folder called cfSeleniumFiles.
  4. Create a folder called CFSelenium within your webroot folder (usually "http" or "www").  Copy the following files and folder from your cfSeleniumFiles folder into the new CFSelenium folder (*updated in August 2012 to reflect additional files):
    • selenium.cfc
    • selenium_tags.cfc
    • server.cfc
    • CFSeleniumTestCase.cfc
    • CFSeleniumTestCase_Tags.cfc
    • test
  5. Create a folder called selenium somewhere on your hard drive that isn't too deep in your folder hierarchy. On my Windows machine, I created it at the root of the hard drive (C:/selenium), while on my Macintosh system I created it under my user account (/Users/Brian/selenium).
  6. In your cfSeleniumFiles folder, open the Selenium-RC folder and copy the .jar file (the Selenium Server file) within that directory to the selenium folder you created in the previous step.
  7. If you're running ColdFusion 8 or ColdFusion 9, you'll want to download and install the MXUnit ColdFusion unit test framework (if you're running ColdFusion 7, skip this step; you'll still be able to execute Selenium commands via CFSelenium but in a different way).  If you don't already have MXUnit installed:
    • Go to the MXUnit website - http://www.mxunit.org/ - and click the download link ("1. Download").
    • Once the .zip file is downloaded, unzip the files into an mxunit folder in your webroot (so you should now have a CFSelenium folder and mxunit folder in your webroot).
That's all you need to do to install what you need to try out CFSelenium. Now you're ready to issue commands to the Selenium Server via CFSelenium and see it in action:


Testing CFSelenium

  1. Any time you want to run Selenium tests through CFSelenium, you need to start the Selenium Server (previously called Selenium-RC):
    • Open up a command line interface. On a Mac, simply open up the Terminal application. If you're machine runs windows, click on the Start button, choose "Run" from the menu, type "cmd" in the input box that appears, and hit the Enter key.
    • Use the "cd" command to navigate to the selenium folder you created earlier (the one where you copied the .jar file).
    • Type in the following command and hit the Enter key:
         java -jar selenium-server-standalone-2.0b2.jar
    • The Selenium Server should start: it will output several lines of activity then stop. If the server does not start, you may need to install Java 1.5 or Java 1.6 on your computer:  if you go to http://www.java.com, the download link/button is front and center.
  2. Now the Selenium Server is ready to respond to commands issued through CFSelenium. What you do next depends on the version of ColdFusion you're running:
    • If you're running ColdFusion 9, run the seleniumTest.cfc MXUnit test in the CFSelenium/test/cf9 folder by calling it in the browser like so:
         http://localhost/CFSelenium/test/cf9/seleniumTest.cfc?method=runTestRemote
    • If you're running ColdFusion 8, run the seleniumTest_cf8.cfc MXUnit test in the CFSelenium/test/cf7_cf8 folder by calling it in the browser like so:
         http://localhost/CFSelenium/test/cf7_cf8/seleniumTest.cfc?method=runTestRemote
    • If you're running ColdFusion 7, run the seleniumTest_cf7.cfm file in the CFSelenium/test/cf7_cf8 folder like so (it mimics the MXUnit test for CF8 and CF9 without using MXUnit):
         http://localhost/CFSelenium/test/cf7_cf8/seleniumTest_cf7.cfm
  3. If everything works, you should observe the Selenium Server react to the commands issued by CFSelenium.  It should start up an instance of Firefox, run through the test routines, and shut down again, and you should be presented with the results of those test routines.
    • If you're on a Windows machine and the Selenium Server fails to launch Firefox, that probably means that Firefox is not defined in your system path, so the Selenium Server does not know the location of the Firefox executable and cannot start Firefox. You can fix this by doing the following:
      • Locate where your firefox.exe file is on your machine (example: C:\Program Files\firefox.exe).
      • Open the appropriate "seleniumTest" file (as listed above).
      • Do a search for " *firefox " (it should only appear once in the file). Add a space after " *firefox " and type in the path to the firefox.exe file, like so:
           *firefox C:\Program Files\firefox.exe
      • Save the file and try again: it should work this time.
  4. To shut down the Selenium Server when you're done, go back to your command window and hit Control-C on your keyboard to shut down the server.

Going Further

Now you have CFSelenium installed, know how to start the Selenium Server that receives the commands from CFSelenium, and have run through one of the included tests, hopefully you'll want to learn how to create your own tests. For that, you should download and install the Selenium IDE plugin for Firefox so that you can record your own browser behavior tests. The documentation for using Selenium IDE is quite thorough.  Pay particular attention to the "Adding Verifications and Asserts With the Context Menu" section:  verifications and asserts are key to actually doing browser behavior testing with Selenium/CFSelenium (I'll touch on that briefly in my next blog post).

Included in the CFSelenium download file is a plugin for the Selenium IDE (yes, a plugin for a plugin) that adds the ability to export the Selenium IDE recordings (test cases) as CFSelenium commands wrapped in an MXUnit test case.  To install it, double-click on the cfml-formatters-1.0.xpi file in the cfSeleniumFiles/formats folder you created out of the CFSelenium download file.  Even if you're running ColdFusion 7 and can't run the plugin output directly (as MXUnit isn't supported in ColdFusion 7), the plugin still saves you the step of translating the recorded steps into CFML cfscript statements.  If you are using ColdFusion 8 or 9 and can run CFSelenium via MXUnit tests, I would suggest checking out the MXUnit documentation, especially the "Testing Basics" section, so you know a bit about how MXUnit works.

After you've recorded a few tests, you'll probably want to run those tests on other browsers.  The Selenium Server supports a number of different browsers but sometimes you have to do some tweaking to get the Selenium Server and the browser working together:  that'll be the subject of another post.

Tuesday, March 22, 2011

CFSelenium Now Compatible With ColdFusion 7 and 8

A few weeks ago, Bob Silverberg released his latest open-source project, CFSelenium.  For those who don't know about the project, a little background:  Selenium is a tool suite for testing web pages.  The most well-known member of the Selenium product family is Selenium IDE, a Firefox plugin that lets you record the actions performed on a web page (or a series of connected web pages) and the results of those actions.  You can then use the recording (stored as a series of commands) to redo those steps whenever you need to test the page or pages after making changes.  Another member of the Selenium product family is Selenium Server (formerly called Selenium-RC), which is a small, Java-based server that can run scripts comprised of Selenium commands in multiple browsers, allowing you to conduct the same kinds of tests recorded by Selenium IDE in browsers other than Firefox:  a great way to test web page functionality across multiple browsers.

In creating CFSelenium, Bob made it possible (easy, in fact) to create and run Selenium Server scripts using ColdFusion 9, and created a plugin for Selenium IDE that would output the recording statements in CFSelenium format within MXUnit test case functions.

Bob wrote CFSelenium in ColdFusion 9-compatible cfscript, and after he announced the project a few folks inquired about the possibility of having a version written in tag-based CFML.  On somewhat of a whim, I decided to take on that task, and ended up with a tag-based version of Bob's original selenium.cfc file that is compatible with both ColdFusion 7 and ColdFusion 8, as well as a few test files that run against the tag-based version.

Bob has now incorporated my tag-based version and my test files into the CFSelenium project, and we've agreed that I will maintain the tag-based version while he maintains the CF9 script verison.  You can download CFSelenium from either RIAForge (http://cfselenium.riaforge.org/) or from GitHub (https://github.com/bobsilverberg/CFSelenium).  For more about Selenium in general, I'd suggest reading Bob's blog post announcing CFSelenium as well as the Selenium website.

So if you're a developer whose responsibilities include cross-browser testing of your web pages, you should really check out CFSelenium.

Wednesday, March 16, 2011

ColdFusion Builder 2 Extension That List Keyboard Shortcuts in an Eclipse View Panel

Last night, I posted a simple ColdFusion Builder 2 extension that, when activated, creates an Eclipse view that lists all of the defaut Builder-specific keyboard shortcuts in the current ColdFusion Builder 2 beta.  You can get it from RIAForge at http://cfbshortcutkeys.riaforge.org/.

I created this extension using Sagar Ganatra's list of CF Builder 2 keyboard shortcuts and by looking at how Ray Camden altered the VarScoper extension to display in an Eclipse view (see http://www.adobe.com/devnet/coldfusion/articles/cfb2-extensions.html).  The ability to display extension UIs in an Eclipse view (a movable windowed component, like the built-in Navigator or Outline views) rather than a modal window is a wonderful enhancement in Builder 2.

A few notes about the extension:

  • When you open the extension view, you have to click on either the Windows or Mac link to display the proper shortcut list (although the only difference in the shortcuts is that you use either the Ctrl key or the Cmd key).  If there's a way to detect the user's OS automatically, I haven't found it yet (cgi.http_user_agent wasn't useful in this regard).

  • It is a static list of the shortcut defaults as they are shipped in Builder 2.  If you change one of these shortcuts in your preferences, the change WILL NOT be reflected in the list.  I looked around to see if the default keyboard shorcuts were stored in a readable file somewhere that the extension could examine and parse, but it looks like that isn't the case:  user-defined and user-modified shortcuts are written to certain configuration files, but the default shortcuts are not exposed in that manner (if someone knows differently, speak up).

  • However, the advantage to it being a static list is that you can go ahead and customize the list in your copy of the extension.  If you pay attention to where the extension files are copied to when you install the extension, it's easy enough to go to that location, find the extension folder, and edit the index.cfm file in the extension.  It's a simple file, so it's easy to edit.

Hopefully this extension will be useful to folks who are trying to learn the new shortcuts, as you can use it to put the list right next to your editor window as you work.

UPDATE: per Sam Farmer's suggestion in the comments (thanks, Sam!), I've updated the shortcut to do OS detection using the os.name variable value in the server scope.