Tuesday, May 24, 2011

CFSelenium News: No Need To Start Selenium Server Separately Anymore

In my earlier blog post on how to install and run CFSelenium, my steps included directions on copying the .jar file for the Selenium-RC/Selenium Server application to an easily accessible location and then starting your CFSelenium testing session by executing that .jar file from the command line.

I'm happy to report that anyone using CFSelenium in conjunction with ColdFusion 8 or 9 can skip those particular steps.  Marc Esher (of MXUnit fame) recently contributed code to the CFSelenium project that enables CFSelenium to start the Selenium Server (if it's not already running) anytime you run a test, and stops the server once the test is complete.  This code is now part of the latest version of CFSelenium that can be download via the CFSelenium GitHub page.

Unfortunately, when I revised the tag-based, CF 7/8-friendly versions of the CFSelenium files to incorporate Marc's code and ran it against CF 7, I found that CF 7 apparently could not start and stop the Selenium Server via the new code.  So ColdFusion 7 users will still have to start Selenium Server from the command line, but otherwise CFSelenium still works in CF 7.

Monday, May 23, 2011

Integrating Mura with the Jasig Central Authentication Services (CAS)

I've already posted most of this information on the Mura forums, but I wanted to post it here as well for anyone looking for information on this topic.

With the blessings of my boss, I've been playing around with the ColdFusion-powered Mura content management system to see if it might be a good CMS option for us.  From what I've seen so far, Mura is a well-thought out CMS system that is both powerful and easy to use, which is a difficult balancing act.

One of the things my boss wanted me to investigate was whether or not we could tie Mura in with our single sign-on solution, which is CAS (Central Authentication Service), a Jasig project originally created at Yale.  When a user tries to access a page or a site that requires them to authenticate, they are redirected to the CAS server and enters their LDAP-based user id and password on the CAS login page.  If they successfully authenticate, the CAS server redirects them back to the original site and stores a token as a cookie in the user's browser.  If the user visits a different website secured by CAS, the cookie allows them access to that site without the need to log in again.

Mura provides a plugin architecture that allows developers to intercept certain Mura events and run their own code.  A number of Mura shops have created plugins that intercept the Mura login events in order to tie in with their in-house directory and authentication servers, but those login events are triggered by the admin and user login forms built into Mura.  I couldn't go that route:  I needed to circumvent and replace the Mura login form(s) with the CAS login form and have Mura log in the user based on the credential information returned by CAS.

After some digging into the code and some trial-and-error, I came up with a way to authenticate Mura administrators via our CAS system.  First, I created admin user accounts in Mura where the username matched the username/user identifier returned by a successful CAS login.  Then I created a Mura plugin that would fire with the OnGlobalRequestStart event with the following event handler:


...The code in this plugin will only execute if the user navigates to /admin/index.cfm (without any URL query parameters) and the "mura" struct in the session scope contains an empty userId key.  Without these conditionals, the login code will run at times when you don't want it to, like when the user is trying to log out or when saving page edits (apparently saving content changes involves navigating to the admin/index.cfm page without URL query parameters).

The NetId is the user identifier returned by CAS.  If it's not found in the session scope, the action is redirected to adminCASLogin.cfm, a variation on the CAS authentication script posted on the CAS website (https://wiki.jasig.org/display/CASC/ColdFusion+client+script).  The user enters their username and password on our CAS login form page, and if the log in is successful the adminCASLogin.cfm page copies the NetId to the session scope and uses cflocation to go to admin/index.cfm.

Now that the NetID exists in session, the plugin queries the tUsers table (the Mura database table containing, well, user records) for an admin account with a username that matches the NetId and gets back the Mura userId for that person, and provides that userId along with other values to the loginManager's loginByUserID() function.  The admin user ends up in the administrative Dashboard, logged in and ready to go.

The one drawback to this method is that when a user logs out, they are presented with the normal Mura admin login form, which can be a little confusing.  But without knowing the password to their Mura user record, they would still have to log in via CAS.

I wrote a similar plugin for requiring CAS authentication to access a particular Mura site (an "internal" site only viable to authorized personnel).  In this case, the event handler executes in response to the OnSiteRequestStart event:


...in this case, I had to create my own session variable (session.userId) for denoting if the user had already authenticated via CAS.  The siteCASlogin.cfm file is pretty much the same as the adminCASLogin.cfm file in the first example except that when it completes the CAS authentication it uses cflocation to return to the index.cfm page of the site (rather than admin/index.cfm).

If the user successfully authenticates via CAS and has any sort of Mura user account, they will be granted access to the site, and if they are a Mura admin they will be logged in so they can edit the site if they wish.

Sunday, April 3, 2011

Quick Tip: Controlling Execution Speed in CFSelenium

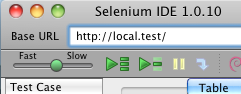
When you use Selenium IDE to play back the actions you've recorded on a web page (the clicks, the text input, etc.), you can control the waiting period between the execution of each command using the slider control on the left end of the tool bar:

With CFSelenium, the way that you control the time period between executions is with the setSpeed(string milliseconds) function.  Once you set the execution speed with this function, the time period between executions will remain set at that length until you use setSpeed again.  So you could set the speed once within the setUp() function of your MXUnit test case...

public void function setUp() {
    browserUrl = "http://local.test";
    selenium = new CFSelenium.selenium(browserUrl, "localhost", 4444, "*firefox");
    selenium.start();
    selenium.setTimeout(30000);
    selenium.setSpeed("1000");
}


...or you could alter the speed within a test case function...

public void function testFormValidation() {
    selenium.open("blah/index.cfm?event=addEditUser&userId=12");
    selenium.setSpeed("3000");
    //Now Selenium will wait 3 seconds between each of the following command statements
    selenium.type("firstName", "John");
    selenium.type("lastName", "White");
    //Setting the speed back down to 1 second
    selenium.setSpeed("1000");
    ....
}


Knowing how to change the speed in CFSelenium is crucial if you're testing any sort of operation that might take a second or two to update the page, like an AJAX call that populates a drop-down box:  if the next command in your test requires that drop-down box to be populated, but CFSelenium tries to run that command before the AJAX call completes, either your test will fail or you'll get an error message from Selenium.  The setSpeed function lets you slow down the execution speed so your AJAX calls have time to do their work before the next step in the test.

Monday, March 28, 2011

Taking Screenshots with CFSelenium

In addition to doing browser behavior testing, there are four functions in CFSelenium that you can use to capture screenshots.  The first two are:

captureScreenshotToString(): captures a shot of your current monitor display in .png format and returns the image data as a base-64 encoded string. **

captureScreenshot(string filename): captures a shot of your current monitor display in .png format and writes the image data to the filename passed in as the argument.  The filename parameter must be a full path ending in a filename, like "C:\Data\Screenshots\screenshot1.png." **


**These two functions work for all supported browsers, but because they take an image of the entire monitor screen, the browser window launched by *CFSelenium may be obscured by other windows on your monitor, and sometimes CFSelenium (or more specifically the Selenium Server) places the browser window in the lower half of the monitor, cutting off the view of the lower half of the window.

The other two screenshot functions capture only an image of the web page in the browser launched by CFSelenium, and they capture that page in its entirety: even if the page is long enough to scroll for several screens, all of that content will be captured.  While that can make for some very elongated images, it does capture all parts of the page.  But unlike the first two functions, these can only be used with certain browsers:


captureEntirePageScreenshotToString(): captures the entire web page in .png format and returns the image data as a base-64 encoded string.  Only works when used with Firefox.

captureEntirePageScreenshot(string filename, string kwargs): captures the entire web page in .png format and writes the image data to the filename passed in as the first argument.  The filename parameter must be a full path ending in a filename, like "C:\Data\Screenshots\screenshot1.png." The second argument is a string that modifies the way the screenshot is captured.  At the moment, it can only be used to alter the background of the HTML document object of the page.  An empty string can be passed as the argument, like so:

selenium.captureEntirePageScreenshot("C:\Data\Screenshots\screenshot1.png","");


The captureEntirePageScreenshot works when used with Firefox.  You call also use it with Internet Explorer with a helper program called snapsIE if you do the following:

  1. Go to http://snapsie.sourceforge.net/ and click on the "snapsie-0.2" link to download the file. The file is a compressed .tar.gz file, so you will need a program that can extract the files from that package (Mac OS X can open it as if it were a .zip file).

  2. Ignore the first of the bullet points on the http://snapsie.sourceforge.net/ page but follow the rest of them to register the snapsIE .dll file.

  3. The last of the bullet points alludes to the fact that the security restrictions regarding ActiveX controls can block the use of snapsIE. In experimenting with it, I ended up making the following changes to Internet Explorer's security settings under "Internet Options":

    • Automatic prompting for ActiveX controls: Disable

    • Run ActiveX controls and plug-ins: Enable

    • Script ActiveX controls marked safe for scripting: Enable

    (Even after making those changes, the first time I had CFSelenium try to capture a acreenshot with IE, I had to watch the test run and click on the prompt at the top of the web page and tell IE to allow the snapsIE script to run on all sites.)

  4. When you instantiate the CFSelenium object to run the test that will take the screenshots, make sure you use "*iexploreproxy" as the browser string instead of the regular "*iexplore"


...The ability to take screenshots with CFSelenium lets you use CFSelenium to test the look of your web pages in other browsers in addition to testing how the page behave. And if you have a need to generate a portfolio of screenshots for a client, using the captureEntirePageScreenshot function could save you some time with that task.

Sunday, March 27, 2011

Using CFSelenium With The Most Common Browsers

When using CFSelenium to send Selenium commands to the Selenium Server, you start off by instantiating CFSelenium as an object.  If you're using the ColdFusion 9 version, you would instantiate it with a statement like this:

browserUrl= "http://www.cnn.com";
selenium = new CFSelenium.selenium(browserUrl);


If you're using the ColdFusion 7 or 8 version, you might instantiate it like so:

<cfset var browserUrl= "http://www.cnn.com" />
<cfset variables.selenium= CreateObject("component","CFSelenium.selenium_tags").init(browserUrl) />


In both cases, you're calling the init() function of the respective CFSelenium .cfc file. The init() function can take 4 arguments:

  • browserURL: (required) the URL of the website (just the address to the webroot, not to any subfolders) you want to run the Selenium commands against.

  • host: (optional) the IP address or hostname of the machine running the Selenium Server instance CFSelenium will be communicating with. The default value is "localhost"

  • port: (optional) the port number used to communicate with the Selenium Server instance. The default is 4444.

  • browserStartCommand: (optional) a string that tells Selenium which web browser on the machine running the Selenium Server instance to use. The default value is "*firefox"

By default, CFSelenium uses Firefox to conduct the browser tests (which makes sense because most of the time you'll use the Selenium IDE Firefox plugin to create your tests). In order to have CFSelenium run a test case through a different browser, you'll have to pass a different browserStartCommand string into the init() function.  You can see a list of the different browserStartCommand strings in this post on StackOveflow:  http://stackoverflow.com/questions/2569977/list-of-selenium-rc-browser-launchers.

Sometimes it's just that simple, but sometimes it's not...and when it's not, it can be a real pain to figure out.  WIth some trial and error, I was able to get Selenium Server/CFSelenium to interact with all of the browsers I had installed on my Windows and Macintosh laptops.  Here's what I had to do it each case:

Firefox

Windows 7: The typical browser string shorthand for starting Firefox ("*firefox") only works if Selenium Server can use your operating system to find out where the browser executable file is. Because Firefox isn't documented in my Windows 7 PATH envionment value, I had to add the full path to the firefox.exe file in the browser string. So my CFSelenium instantiation statement ended up looking like this:

selenium = createObject("component","CFSelenium.selenium").init("http://www.cnn.com","localhost", 4444, "*firefox C:\Program Files\Firefox\firefox.exe");

Mac OS X: The default/regular Firefox browser string "*firefox" worked just fine.

Google Chrome

Windows 7: The regular "*googlechrome" browser string worked fine.

Mac OS X: The regular "*googlechrome" browser string worked fine.

Safari

Windows 7: Safari comes with a pop-up window blocker that is turned on by default, and while on it will prevent the Selenium Server from doing anything beyond opening the browser window. To turn off that blocker in the Windows version, click on the gear icon in the upper right corner and click on "Block Pop-Up Windows" to uncheck it. Once I did that, I was able to run Safari using the "*safariproxy" browser string (it wouldn't take the regular Safari browser string) and specifying the location of the Safari executable file (similar to what I did with Firefox).

Mac OS X: Once I turned off the pop-up blocker (by clicking on "Safari" in the menu bar and unchecking "Block Pop-Up Windows"), I was able to run Safari with the normal "*safari" browser string>.

Opera

Windows 7: Although Opera 9 was the last version of Opera officially supported for the Selenium Server, I was able to run Opera 11.01 using the "*opera" string and specifying the location of the opera.exe file.

Mac OS X: This was the hardest one to figure out. Here's what I ended up doing:

  • I had to define a proxy server in Opera that would accept the commands coming from the Selenium Server using the following steps:

    1. In the Opera menu bar, I clicked on "Opera" and then "Preferences".

    2. In the Preferences window, I clicked on "Advanced", then choose "Networks" from the column of options on the left, then clicked on the "Proxy Servers..." button.

    3. In the Proxy Servers window, I put a checkmark next to "HTTP", entered "localhost" in the text box to the right of the "HTTP" checkbox, and entered "4444" in the corresponding Port box.

  • I could not use any of the Opera-specific browser strings. I ended up having to use the "*custom" browser string and specify the location of the Opera executable...which is NOT the "Opera.app" listed in the Application folder but a file within that application package/folder:

selenium = createObject("component","CFSelenium.selenium").init("http://www.cnn.com","localhost", 4444, "*custom /Applications/Opera.app/Contents/MacOS/Opera");

Even after all that, the behavior was still a bit flaky. Sometimes Opera would start with a dialog box asking if you wanted to restore the last session (as if Opera had crashed after the last session). Sometimes Selenium wouldn't proceed past the "Speed Dial" Opera startup page: telling Opera to use an actual homepage helped but that setting change didn't seem to take effect upon the next startup of Opera but rather the startup after that.

Internet Explorer 8

Windows 7: I wasn't able to use the regular "*iexplore" browser string, but "*iexploreproxy" worked fine (and with IE being part of the OS, I didn't need to specify the path to the executable).

Mac OS X: If you're running virtual machine software (I use VMWare Fusion) on your Mac in order to run a Windows environment, you can run your CFSelenium tests against IE running in that VM by doing the following:

  • Place a copy of the Selenium Server .jar file on your VM instance of Windows just as you did when you installed CFSelenium on your Mac.

  • Find out what the IP address of your VM instance is. The easiest way to do that is to open a command-line interface in Windows (by clicking the Start button, choosing "Run...", typing "cmd" in the text box and hitting the Enter key), and typing "ipconfig -all" to get the current network statistics for the Windows instance: you want the address under "IP Address".

  • Use the command-line interface to start the Selenium Server on your Windows instance (just as you would do on your Mac).

  • Instantiate CFSelenium using the IP address of the Windows VM and "*iexplore" as the browser string. So if the IP address of your Windows VM is 172.16.9.9, the instantation statement would look like this:

selenium = createObject("component","CFSelenium.selenium").init("http://www.cnn.com","172.16.9.9", 4444, "*iexplore");

When you run CFSelenium against the Selenium Server on your Windows VM, you'll see the Selenium Server on the VM doing all the work, even though the test results will be reported back to whatever browser you're using to run the test on the Mac side.

...This was how I got all the browsers to run with CFSelenium on my computers. It may be different for your computer(s), but hopefully the information I've provided here will at least be of some help.

Brief Guide to Testing Browser Behavior with Selenium IDE and CFSelenium

The Selenium IDE Firefox plugin makes it easy to record the actions you perform on a web pages or series of web pages as a set of commands.  You simply open the Selenium IDE tool from the "Tools" menu in Firefox, make sure the Record button (the red circle in the upper right) is active, and then click and type away.  Once you've stopped recording, you can re-run the the recorded steps any number of times and even save the steps as a test case file to run again later.

Simply recording your actions as described above can be useful when you're troubleshooting a browser behavior (usually a Javascript function) that only executes after you've changed certain form fields or performed particular actions:  it saves you the time of constantly reloading the page and manually going through the actions again.  But you don't end up with an actual verifiable test:  you're verifying whether or not the page is behaving correctly by visually observing the outcome each time.  In order to use Selenium (and especially CFSelenium within the context of MXUnit) as a true testing tool, you need to add verification and assertion statements into your Selenium recordings.

Fortunately, it's easy to add such statements with Selenium IDE.  If the browser behavior results in a visible change to the page (like updating text in a form field), right-click on the changed part of the page.  At the bottom of the context menu that appears will be several Selenium commands you can choose to add to your current recording.  One or more of the commands will be a "verify" or "assert" command that you can add to your recording that basically means "return true if this page element contains this value or this text; return false if not".

Take the example below.  If the user selects "College" from the first select box on the bottom line, an AJAX call is made that populates the third select box on that line with the acronyms of the various colleges.  When I right-click on that third select box, I can select the verification command that verifies whether or not the select box contains all of the acronyms (you can see all of the text labels for the options in the select are concatenated together).  Other verfication and assertion commands for the element you selected might also be available under the "Show All Available Commands" option at the bottom of the context menu.

It's these verfications and assertions that you save in your recording that form the basis for your testing with CFSelenium and MXUnit.  When you export your Selenium recording as a CFSelenium/MXUnit test case and then run it, MXUnit is going to receive the results of the verifications/assertions from the Selenium Server and report the test case as having passed or failed based on those results.  When your CFSelenium/MXUnit test case passes in Firefox, you can then use CFSelenium to run the test case against other browsers and see if it passes or fails.  If it fails in Browser X, you can look at the test results to see which verifications/assertions failed and then figure out how to modify your page's behavior/Javascript so that it works in that Browser X...and once it works in Browser X, you'd re-run the test for Firefox and the other browsers to make sure the newly modified page still passes the tests in those browsers.

If you're running CFSelenium on ColdFusion 8 or 9 in conjunction with MXUnit, you can add MXUnit debug() statements to your test cases to retrieve additional information from the test (beyond the success or failure of the verifications or assertions).  For example, you could add the following line to your MXUnit test case to retrieve all of the text on the web page used in the test:

debug(selenium.getBodyText());


For more information about the debug() statement, consult the MXUnit documentation. For more information about what kinds of data CFSelenium can return from the test, look through the functions and read the hints in the relevant CFSelenium .cfc file (selenium.cfc for ColdFusion 9, selenium_tags.cfc for ColdFusion 7 and 8).

Quick Guide for Installing and Running CFSelenium

I've been playing around with CFSelenium this week in order to come up with an implementation that will let me easily replicate and run tests I've created with the Firefox Selenium IDE plugin on multiple browsers.  I've learned a few things along the way that are worth blogging about, but I thought I should start with a blog post on how to get CFSelenium up and running quickly.


Installating CFSelenium

  1. First, you need to have a computer that has either ColdFusion 7, ColdFusion 8, or ColdFusion 9 installed and running such that you can call and execute a .cfm page on the machine (example "http://localhost/myLocalSite/index.cfm"), and you'll need Firefox installed.
  2. Go to Bob Silverberg's CFSelenium GitHub site - https://github.com/bobsilverberg/CFSelenium - and click on the "Downloads" button.  In the pop-up window that appears, click one of the two buttons under "Download source" to download either a .tar.gz archive or a .zip archive, and download the file to your computer.
  3. Extract the files and folders from the downloaded file wherever you like to start with - let's say a folder called cfSeleniumFiles.
  4. Create a folder called CFSelenium within your webroot folder (usually "http" or "www").  Copy the following files and folder from your cfSeleniumFiles folder into the new CFSelenium folder (*updated in August 2012 to reflect additional files):
    • selenium.cfc
    • selenium_tags.cfc
    • server.cfc
    • CFSeleniumTestCase.cfc
    • CFSeleniumTestCase_Tags.cfc
    • test
  5. Create a folder called selenium somewhere on your hard drive that isn't too deep in your folder hierarchy. On my Windows machine, I created it at the root of the hard drive (C:/selenium), while on my Macintosh system I created it under my user account (/Users/Brian/selenium).
  6. In your cfSeleniumFiles folder, open the Selenium-RC folder and copy the .jar file (the Selenium Server file) within that directory to the selenium folder you created in the previous step.
  7. If you're running ColdFusion 8 or ColdFusion 9, you'll want to download and install the MXUnit ColdFusion unit test framework (if you're running ColdFusion 7, skip this step; you'll still be able to execute Selenium commands via CFSelenium but in a different way).  If you don't already have MXUnit installed:
    • Go to the MXUnit website - http://www.mxunit.org/ - and click the download link ("1. Download").
    • Once the .zip file is downloaded, unzip the files into an mxunit folder in your webroot (so you should now have a CFSelenium folder and mxunit folder in your webroot).
That's all you need to do to install what you need to try out CFSelenium. Now you're ready to issue commands to the Selenium Server via CFSelenium and see it in action:


Testing CFSelenium

  1. Any time you want to run Selenium tests through CFSelenium, you need to start the Selenium Server (previously called Selenium-RC):
    • Open up a command line interface. On a Mac, simply open up the Terminal application. If you're machine runs windows, click on the Start button, choose "Run" from the menu, type "cmd" in the input box that appears, and hit the Enter key.
    • Use the "cd" command to navigate to the selenium folder you created earlier (the one where you copied the .jar file).
    • Type in the following command and hit the Enter key:
         java -jar selenium-server-standalone-2.0b2.jar
    • The Selenium Server should start: it will output several lines of activity then stop. If the server does not start, you may need to install Java 1.5 or Java 1.6 on your computer:  if you go to http://www.java.com, the download link/button is front and center.
  2. Now the Selenium Server is ready to respond to commands issued through CFSelenium. What you do next depends on the version of ColdFusion you're running:
    • If you're running ColdFusion 9, run the seleniumTest.cfc MXUnit test in the CFSelenium/test/cf9 folder by calling it in the browser like so:
         http://localhost/CFSelenium/test/cf9/seleniumTest.cfc?method=runTestRemote
    • If you're running ColdFusion 8, run the seleniumTest_cf8.cfc MXUnit test in the CFSelenium/test/cf7_cf8 folder by calling it in the browser like so:
         http://localhost/CFSelenium/test/cf7_cf8/seleniumTest.cfc?method=runTestRemote
    • If you're running ColdFusion 7, run the seleniumTest_cf7.cfm file in the CFSelenium/test/cf7_cf8 folder like so (it mimics the MXUnit test for CF8 and CF9 without using MXUnit):
         http://localhost/CFSelenium/test/cf7_cf8/seleniumTest_cf7.cfm
  3. If everything works, you should observe the Selenium Server react to the commands issued by CFSelenium.  It should start up an instance of Firefox, run through the test routines, and shut down again, and you should be presented with the results of those test routines.
    • If you're on a Windows machine and the Selenium Server fails to launch Firefox, that probably means that Firefox is not defined in your system path, so the Selenium Server does not know the location of the Firefox executable and cannot start Firefox. You can fix this by doing the following:
      • Locate where your firefox.exe file is on your machine (example: C:\Program Files\firefox.exe).
      • Open the appropriate "seleniumTest" file (as listed above).
      • Do a search for " *firefox " (it should only appear once in the file). Add a space after " *firefox " and type in the path to the firefox.exe file, like so:
           *firefox C:\Program Files\firefox.exe
      • Save the file and try again: it should work this time.
  4. To shut down the Selenium Server when you're done, go back to your command window and hit Control-C on your keyboard to shut down the server.

Going Further

Now you have CFSelenium installed, know how to start the Selenium Server that receives the commands from CFSelenium, and have run through one of the included tests, hopefully you'll want to learn how to create your own tests. For that, you should download and install the Selenium IDE plugin for Firefox so that you can record your own browser behavior tests. The documentation for using Selenium IDE is quite thorough.  Pay particular attention to the "Adding Verifications and Asserts With the Context Menu" section:  verifications and asserts are key to actually doing browser behavior testing with Selenium/CFSelenium (I'll touch on that briefly in my next blog post).

Included in the CFSelenium download file is a plugin for the Selenium IDE (yes, a plugin for a plugin) that adds the ability to export the Selenium IDE recordings (test cases) as CFSelenium commands wrapped in an MXUnit test case.  To install it, double-click on the cfml-formatters-1.0.xpi file in the cfSeleniumFiles/formats folder you created out of the CFSelenium download file.  Even if you're running ColdFusion 7 and can't run the plugin output directly (as MXUnit isn't supported in ColdFusion 7), the plugin still saves you the step of translating the recorded steps into CFML cfscript statements.  If you are using ColdFusion 8 or 9 and can run CFSelenium via MXUnit tests, I would suggest checking out the MXUnit documentation, especially the "Testing Basics" section, so you know a bit about how MXUnit works.

After you've recorded a few tests, you'll probably want to run those tests on other browsers.  The Selenium Server supports a number of different browsers but sometimes you have to do some tweaking to get the Selenium Server and the browser working together:  that'll be the subject of another post.